
Growing worm castings, also known as vermicompost or worm manure, is a fantastic way to create a nutrient-rich fertilizer for your organic garden. As an organic gardener, using red wiggler worms (Eisenia fetida) for composting is a highly recommended practice due to their numerous benefits. Here are some of the key reasons why red wiggler worms are ideal for composting:
Advantages of Red Wiggler Worms:
- Efficient Decomposers: Red wiggler worms are voracious consumers, eating up to half their body weight in organic matter every day. This means they can quickly break down complex materials into a nutrient-rich compost.
- High Nutrient Content: The compost produced by red wiggler worms is rich in nutrients, including nitrogen, phosphorus, and potassium. This makes it an ideal fertilizer for plants.
- Microbial Balance: Red wiggler worms help to maintain a balanced microbial community in the compost pile. This ensures that the compost is teeming with beneficial microorganisms that can aid plant growth.
- Low Odor Emissions: Unlike traditional composting methods, red wiggler worm composting produces minimal odors due to the worms’ efficient breakdown of organic matter.
- Space-Efficient: Red wiggler worms can thrive in small spaces, making them ideal for urban gardeners or those with limited land availability.
- Low Maintenance: Worm composting requires minimal maintenance, as the worms do most of the work. Simply provide food and a suitable environment, and let the worms do their magic!
- Year-Round Composting: Red wiggler worms can thrive in a wide range of temperatures (10°C to 25°C / 50°F to 77°F), making them ideal for year-round composting.
- Pathogen Removal: The red wiggler worms’ digestive system is capable of breaking down pathogens and weed seeds, making the compost safe for use in gardens.
Additional Benefits:
- Improved Soil Structure: The compost produced by red wiggler worms can help to improve soil structure, reducing erosion and improving water retention.
- Increased Crop Yields: By providing plants with a rich source of nutrients, red wiggler worm compost can lead to increased crop yields and improved plant health.
- Reduced Chemical Use: By using red wiggler worm compost as a fertilizer, gardeners can reduce their reliance on chemical fertilizers and improve soil health.
Tips for Successful Worm Composting:
Monitor the compost pile’s temperature and moisture levels to ensure optimal conditions.
Provide a suitable environment (temperature range, humidity, etc.) for the worms.
Feed the worms regularly with organic matter (food scraps, etc.).
Maintain good hygiene practices to prevent contamination of the compost.
Materials Needed:
- Worm bin (you can purchase one or build your own using wood and wire mesh)
- Red wiggler worms (Eisenia fetida) – the ideal species for worm composting
- Food scraps (fruit, vegetable peels, tea bags, coffee grounds, eggshells)
- Brown materials (dried leaves, shredded newspaper, cardboard)
- Water spray bottle
Setting Up the Worm Bin:
- Place the worm bin in a well-ventilated area with minimal direct sunlight.
- Add a 10-15 cm layer of brown material to the bottom of the bin for drainage and moisture control.
- Introduce the red wiggler worms (about 500-1000 per square foot) into the bin.
Maintaining the Worm Bin:
- Feed the worms with a mix of food scraps and brown materials, aiming for a ratio of 2/3 brown material to 1/3 green material.
- Add water as needed to maintain a damp but not soggy environment (worms can drown if the bin is too wet).
- Monitor temperature – worms thrive between 15°C and 25°C (59°F and 77°F). Avoid placing the worm bin near heating vents or radiators.
- Turn the contents every few weeks to ensure even decomposition and aeration.
Winter-Specific Strategies:
- Compost Tea Brews: Use compost tea brews as an additional source of nutrients for your worms during winter months.
- Cold-Tolerant Bacteria: Add cold-tolerant bacteria (e.g., Lactobacillus) to the worm bin to aid in decomposition and nutrient cycling.
- Keep them Warm: Red wiggler worms can survive temperatures as low as 10°C (50°F), but optimal temperatures range from 15°C to 25°C (59°F to 77°F). To keep them warm, place their enclosure in a location that receives minimal direct sunlight and is away from heating vents.
- Provide Insulation: Wrap the worm bin with insulation materials like straw or foam sheets to maintain a consistent temperature.
Harvesting the Worm Castings:
- After 2-3 months, the worm castings will be ready for harvest. They should be dark brown, have an earthy aroma, and resemble a fine compost.
- To collect the worm castings, turn off any aeration systems (if using) and let the bin settle.
- Carefully remove the top layer of castings without disturbing the worms.
Moving the Worm Castings to Your Garden:
- Store the harvested worm castings in an airtight container or bag to prevent moisture loss.
- Apply 1-2 cm (0.5-1 inch) of worm castings around the base of plants as a fertilizer.
- Mix 10-20% worm castings with soil and use it as potting mix for seedlings or transplants.
- Use worm castings as a mulch, mixing them with organic matter like straw or leaves.
More Tips:
- Keep the worm bin away from pets and children to avoid accidental ingestion of worms or worm castings.
- Regularly inspect the worm bin for pests (e.g., fruit flies, ants) and diseases (e.g., fungal growth).
- Consider using a worm tea brewer to extract liquid nutrients from the worm castings – a great way to give your plants an extra boost.
- Keep it Dark: Red wiggler worms are sensitive to light, so keep their enclosure away from direct sunlight.
- Maintain Air Circulation: Ensure good air circulation around the worm bin to prevent anaerobic conditions.
- Avoid Extreme Temperatures: Avoid placing the worm bin near extreme temperatures (e.g., radiators, heating vents) that could harm the worms.
Note: I have not built the below container myself yet! I will update this article once I have, thanks!
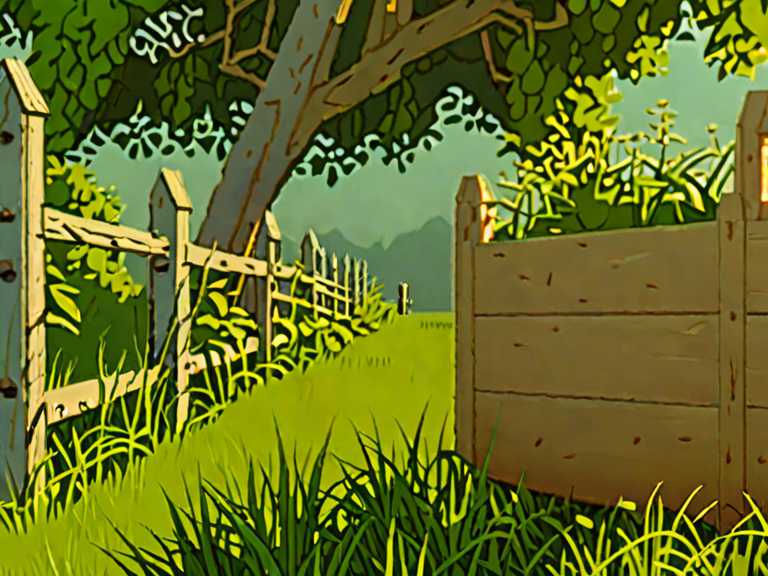
Here’s a plan for a simple and effective wood-based red wiggler vermicomposting container:
Container Specifications:
- Size: 36 inches long x 24 inches wide x 12 inches high (91 cm x 61 cm x 30 cm)
- Material: 3/4 inch thick plywood or oriented strand board (OSB) for the sides and bottom, 1×4 lumber for the frame
- Number of compartments: 6 separate compartments to allow for easy maintenance and harvesting
Materials Needed:
For the container:
- 2 pieces of 3/4 inch plywood or OSB (36 inches x 24 inches each)
- 2 pieces of 1×4 lumber (36 inches long)
- 2 pieces of 1×4 lumber (12 inches long)
- Wood glue
- 2 inch wood screws
- Hinges and latches for easy access
For the frame:
- 6 pieces of 1×4 lumber (24 inches long)
Detailed Steps to Construct the Vermicomposting Container:
Step 1: Prepare the Frame
- Cut four pieces of 1×4 lumber into 36 inch long sections to form the sides and one piece for the back.
- Assemble the frame using wood glue and 2 inch wood screws.
Step 2: Attach the Sides and Back
- Attach the two side pieces to the back piece, forming a rectangular shape.
- Use wood glue and 2 inch wood screws to secure the sides in place.
Step 3: Cut Out Compartments
- Cut out six separate compartments from one of the plywood or OSB sheets (each compartment should be approximately 6 inches x 12 inches).
- Set aside for later use.
Step 4: Assemble the Container
- Place two layers of plywood or OSB on top of each other, with a piece of 1×4 lumber in between.
- Attach the sides and back to the bottom layer using wood glue and 2 inch wood screws.
Step 5: Add Compartments
- Place one compartment on top of another, alternating between compartments as you go up the container.
- Secure each compartment with wood glue and 2 inch wood screws.
Step 6: Attach Hinges and Latches
- Attach hinges to the sides of the container for easy access.
- Add a latch to secure the door in place.
Step 7: Finish and Assemble
- Sand all edges and corners of the container to smooth out any rough spots.
- Apply a finish (stain or sealant) to protect the wood from rotting.
Tips and Considerations:
- Use food-grade materials for the compartments to prevent contamination of the worms’ habitat.
- Drill some holes in the bottom of each compartment to allow excess liquid to drain out.
- Add a small tray at the bottom of each compartment to catch any excess liquid that drains through.
- Keep the container away from direct sunlight and extreme temperatures.
Advantages:
This wood-based red wiggler vermicomposting container offers several advantages, including:
- Easy maintenance and harvesting
- Six separate compartments for easy management of different types of waste
- A simple design that can be easily built or modified
Disadvantages:
- May not be suitable for large-scale worm farming due to the limited space in each compartment.
Overall, this DIY vermicomposting container is an ideal choice for small-scale worm farming and composting.

Bob Mollis is a gentle soul with a green thumb and a love for the simple life. As a seasoned homesteader and grandfather, Bob has spent decades mastering self-sufficiency.
On sprouts.farm, Bob shares tales from his adventures in gardening, raising small animals, growing fruit and nut trees, beekeeping, and woodworking. With a twinkle in his eye, he offers practical tips, personal anecdotes, and inspiring stories from his own journey.
Bob’s writing is warm and engaging, like sitting down with your favorite uncle. He’s not afraid to get messy or try something new, sharing wisdom with anyone willing to listen.